- Overview
- Naming your Schedule
- Specifying Time Zones
- Specifying the days that monitoring will be active
- Specifying the time each day that monitoring will be active
- Using Templates
- Copying Schedules
- Inverse - Monitoring your phone numbers “outside” of the specified schedule
- Quick View of all Schedules
Overview
Schedules serve the purpose of determining when your phone number(s) will receive calls from Tiksoo and when it won’t. If your business operates from Monday to Friday opening at 8:30am and closing at 5:00pm, then you may wish to only monitor your numbers during this time. Creating a schedule that matches with the days and times your business is open is a great start in making sure your customers can reach you during these times.
Naming your Schedule
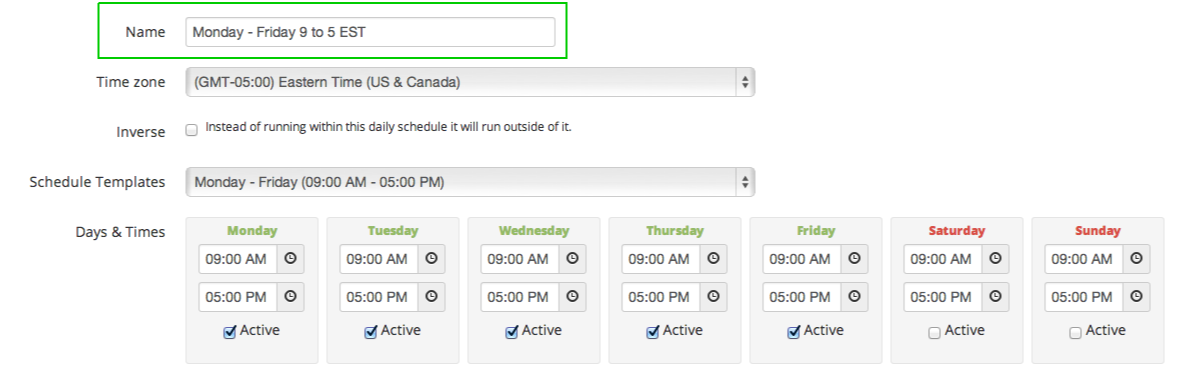
When naming your Schedule it is wise to choose a name that will help you easily identify what days and what time the schedule will be active. For instance if you create a schedule for Monday to Friday that starts at 9am and ends at 5pm it would be confusing if you named it “Schedule 1” as this name doesn’t reveal any detail about the schedule itself. Instead, consider naming it something like “Monday to Friday 9 - 5” so that you can easily identify it when applying it to a Group (see section 4 for Creating Groups)
Specifying Time Zones
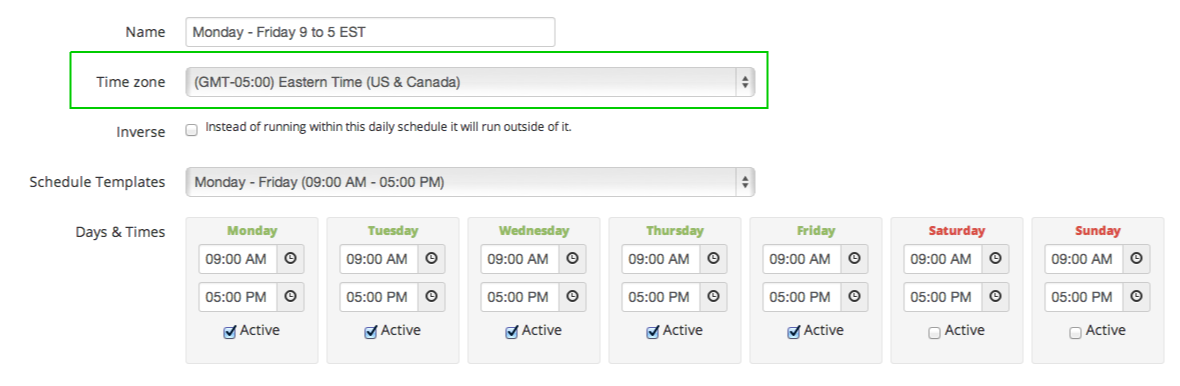
Let’s say you have offices in Toronto Chicago and Los Angeles, all operating from 9am to 5pm in their own local time zones. You can easily create individual schedules for each location, and by taking advantage of the “Time Zone” feature, you will not need to figure out how many hours any one particular office is ahead or behind. In my example below you can see that I have created a Monday to Friday schedule operating within the hours or 9am until 5pm and it is set up for Pacific Time.
Specifying the days that monitoring will be active

Specifying the time each day that monitoring will be active
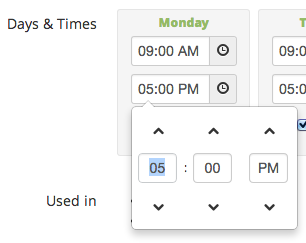
Changing the times is as easy as clicking the clock icon on the day that you would like to change and then simply either use the up and down arrows located above and below the hour, minute and AM/PM boxes.
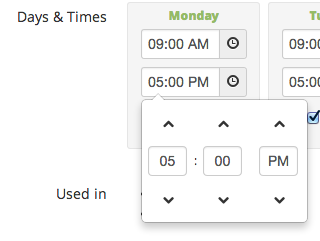
Another option is to click on the actual number itself to type in a new hour or minute
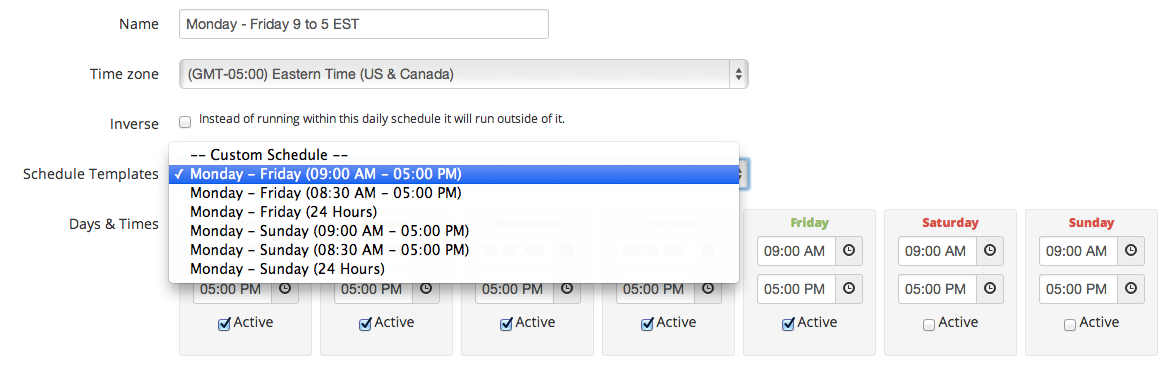
Using Templates
Tiksoo has taken the consideration of providing the most commonly used schedules to help minimize the time needed to set up a new schedule. Instead of changing each day one by one, please refer to the pre-existing templates to see if there is already a schedule that matches your needs. (Or at least is close to your needs so that you can keep your editing to a minimum)

Copying Schedules
This time saving feature is great if you have created a custom schedule and would like to make multiple copies of it but change one minor detail for each copy (i.e. different time zone for each one, or perhaps a different name to reflect different departments such as “Sales”, “Service” and “Claims”.)
To make a copy you simply click on Actions ? Copy and then make the desired change and save it.
Inverse - Monitoring your phone numbers “outside” of the specified schedule
The inverse feature is great for businesses that have closed for the day but need to leave an after-hours message containing vital information. For example, let’s say you are a natural gas company and someone accidentally calls your business office to report a leak. You would likely have a message stating something like “Thank you for calling the gas company, our office is now closed, if this is an emergency or you are reporting a leak, please hang up and call 1-888-555-5555”
In a situation like this your company may be held legally liable for any mishaps should a customer not have access to the emergency number so you would want to be sure to monitor this number from the time the office closed until the time it re-opens to ensure that the proper information is always available.
To use the Inverse feature you would copy the schedule that you already have existing for your normal working hours and rename it with a descriptive title such as ’Office Closed” and then make sure the “Inverse” check box is checked and then apply it to a Group that is configured to monitor your phone number(s). (See section 4 for Creating Groups)
In the example below you can see that I have a business that operates from Monday to Friday 9am – 5pm. However, because I have checked the “Inverse” box my phone number will be monitored from 5:01pm until 8:59am during the weekdays and then 24 hours a day on the weekend. As such I have named the Schedule “Office Closed - Monday to Friday 9 – 5”
Quick View of all Schedules
Once your Schedules have been created, you can view them all from the main “Schedules” page.
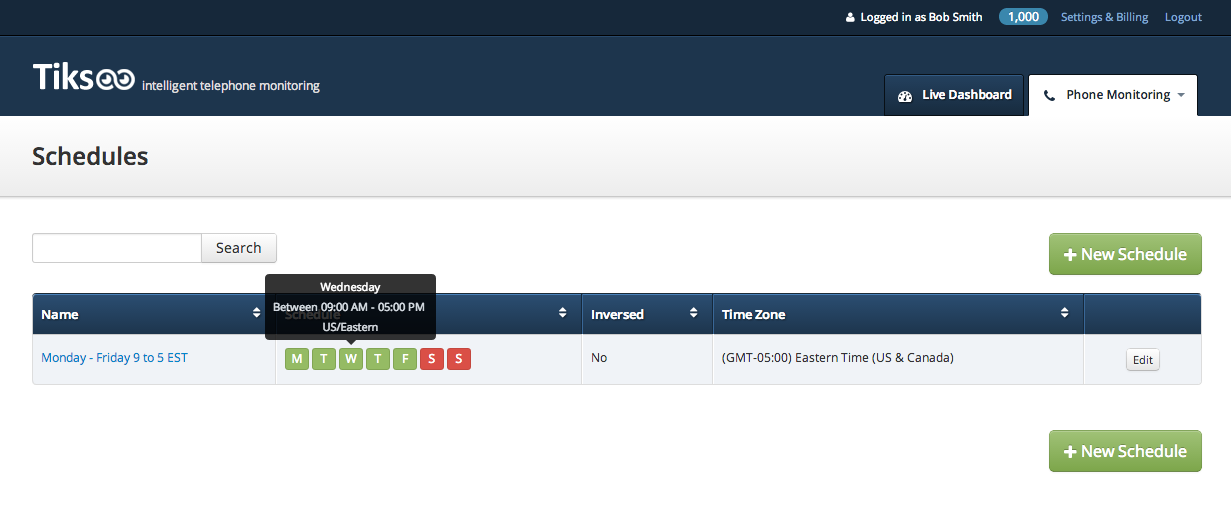
In addition to having descriptive names that allow for quick identification, you will notice that each Schedule has the active days displayed in Green and the inactive days displayed in Red. For a more detailed view of the start and stop times of each day you can hover your mouse over the day you would like to view. Other details such as the Time Zone and whether the schedule is inverted or not is included here as well.